Using the email configuration settings for your email address, you can connect your email account to an existing Gmail account, enabling you to send and receive emails from your custom email address from within your Gmail inbox. This means you won’t have to login to webmail every time you want to check your emails.
The email configuration settings for email accounts hosted with CRJ Design are as follows (replace ‘yourdomain.co.uk’ with your domain name):
Username
[Your full email address, eg. info@yourdomain.co.uk]
Password
[The password for the email account]
Incoming POP3 Server
pop3.yourdomain.co.uk POP3 Port: 995
Outgoing Server
smtp.yourdomain.co.uk SMTP Port: 465
IMAP, POP3, and SMTP require authentication.
Adding your email account to Gmail
Login to your Gmail account and click the Settings icon in the top-right of the screen:
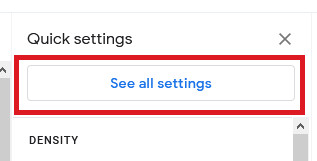
In the Settings menu, click ‘See all settings‘:
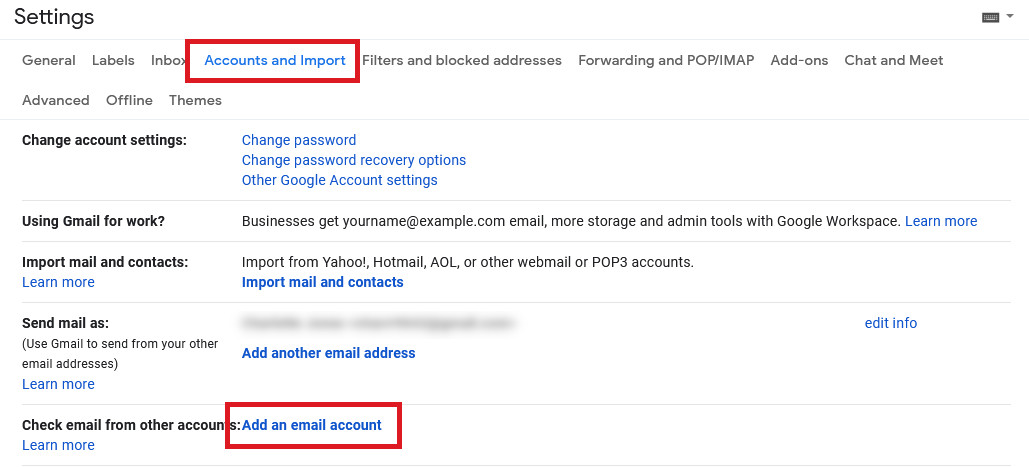
Navigate to the ‘Accounts and Import‘ tab and click ‘Add an email account‘ next to ‘Check email from other accounts‘:
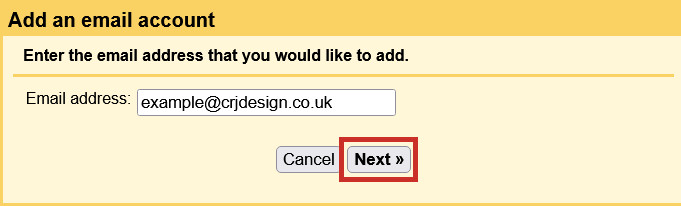
In the pop-up which appears, enter your email address (eg. example@crjdesign.co.uk), and click Next:
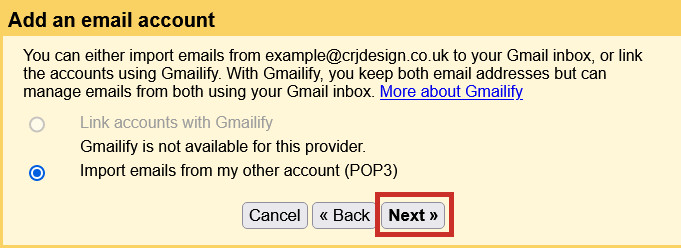
Select the POP3 option (Gmailify won’t be available) and click Next:
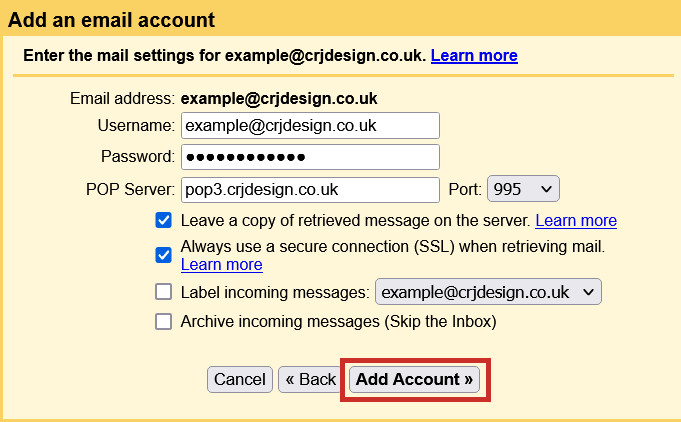
On the next screen, enter the mail settings, using the table at the top of this article as a guide. Remember these are POP3 settings, so the server will be pop3.yourdomain.co.uk and the port will be 995:
Username: This is your full email address (eg. example@crjdesign.co.uk).
Password: Enter the password associated with the email account.
POP Server: pop3.yourdomain.co.uk
Port: 995
Leave a copy of retreived messages on the server: If you select this option, emails will remain on your hosting server, as well as being pulled into Gmail. This means you will still be able to check your emails via webmail, and use another mail client, so we recommend you check this option.
Always use SSL: Ensure you check this option, for security purposes.
Label incoming messages: This will label any emails from your linked email account so you can see where an email in your Gmail inbox has actually been sent to.
Archive incoming messages: We do not recommend selecting this option as new emails will not appear in your inbox.
Click Add Account. If all your settings were correct, you should get the following message:
Please NoteIf you receive an error message at this stage, double-check that your settings and password are correct.
Note that you will now be able to receive emails from your email account into Gmail, but you will not be able to send emails from your email address within Gmail. If you reply to an email, it will be sent from your Gmail account.
To enable you to also send emails from your connected email account, follow the next steps:
Sending emails from your Gmail account:
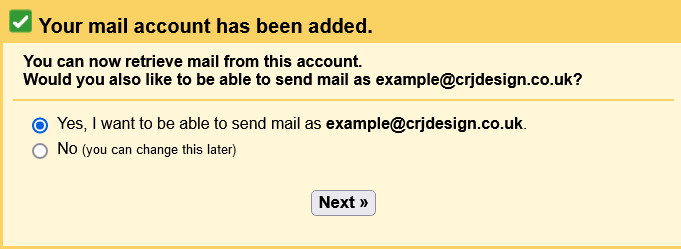
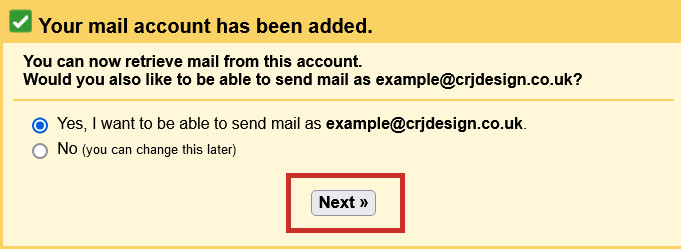
After you’ve successfully added your email account to Gmail, ensure you have selected ‘Yes’ when asked if you would also like to be able to send email as your linked account, and click Next:
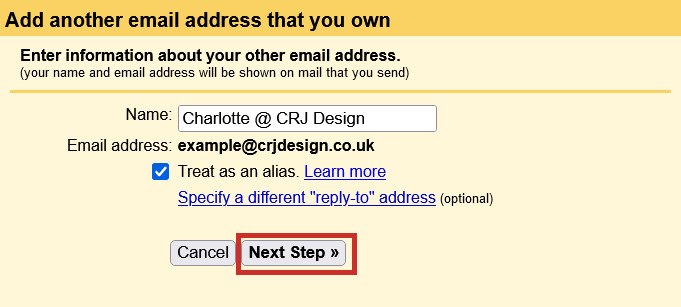
In the next window, enter the name you’d like to use when you send emails from your connected account (we recommend using your name, your business name, or a combination of both, eg. Your Name @ Your Business). Ensure you have ‘Treat as an alias’ checked and click Next Step:
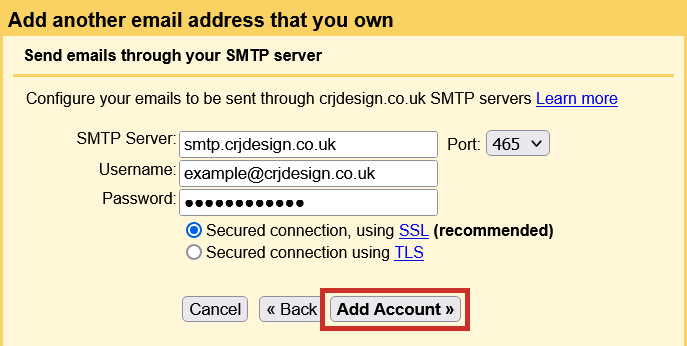
On the next screen, enter the server, username, and password again. This time the server will be smtp.yourdomain.co.uk and the port will be 465, as it’s the SMTP setting. Click Add Account:
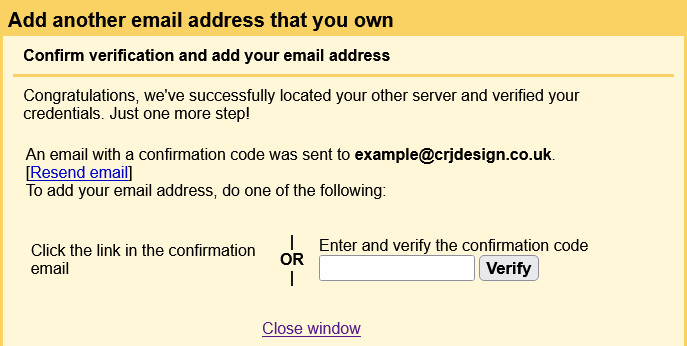
If your settings were correct, you should see the following message. You will need to enter the verification code sent to your email account (you can login to Webmail to check), or click the link in the email sent to you, to confirm that it’s really you.
Once your email account has been verified, you will be able to send and receive emails from your connected email account from within Gmail. When you create a new email, you can choose which email address to send it from.