How to edit an existing blog post

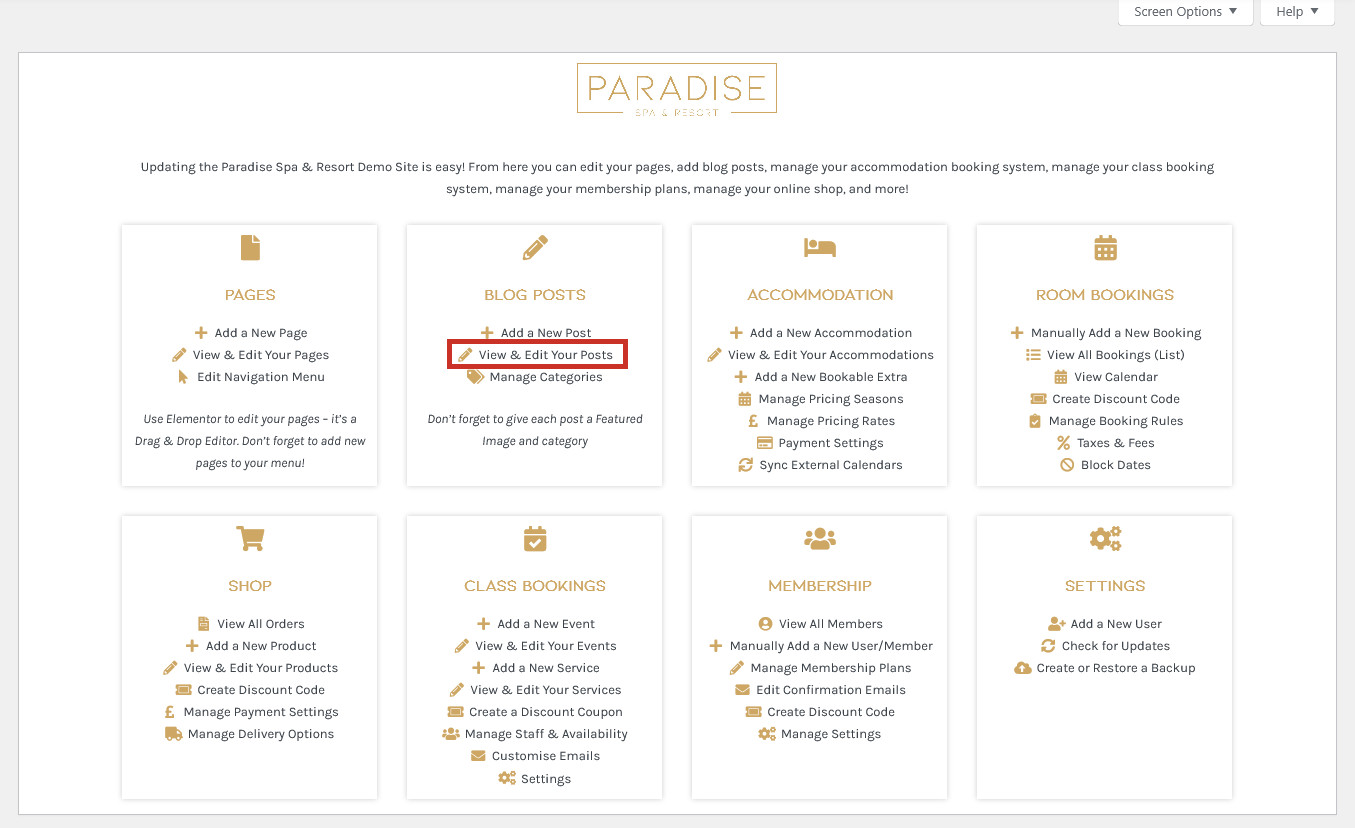
Making changes (edits) to an existing blog post is really straight-forward. In your dashboard, click the View & Edit Your Posts link under the ‘Blog Posts’ heading:
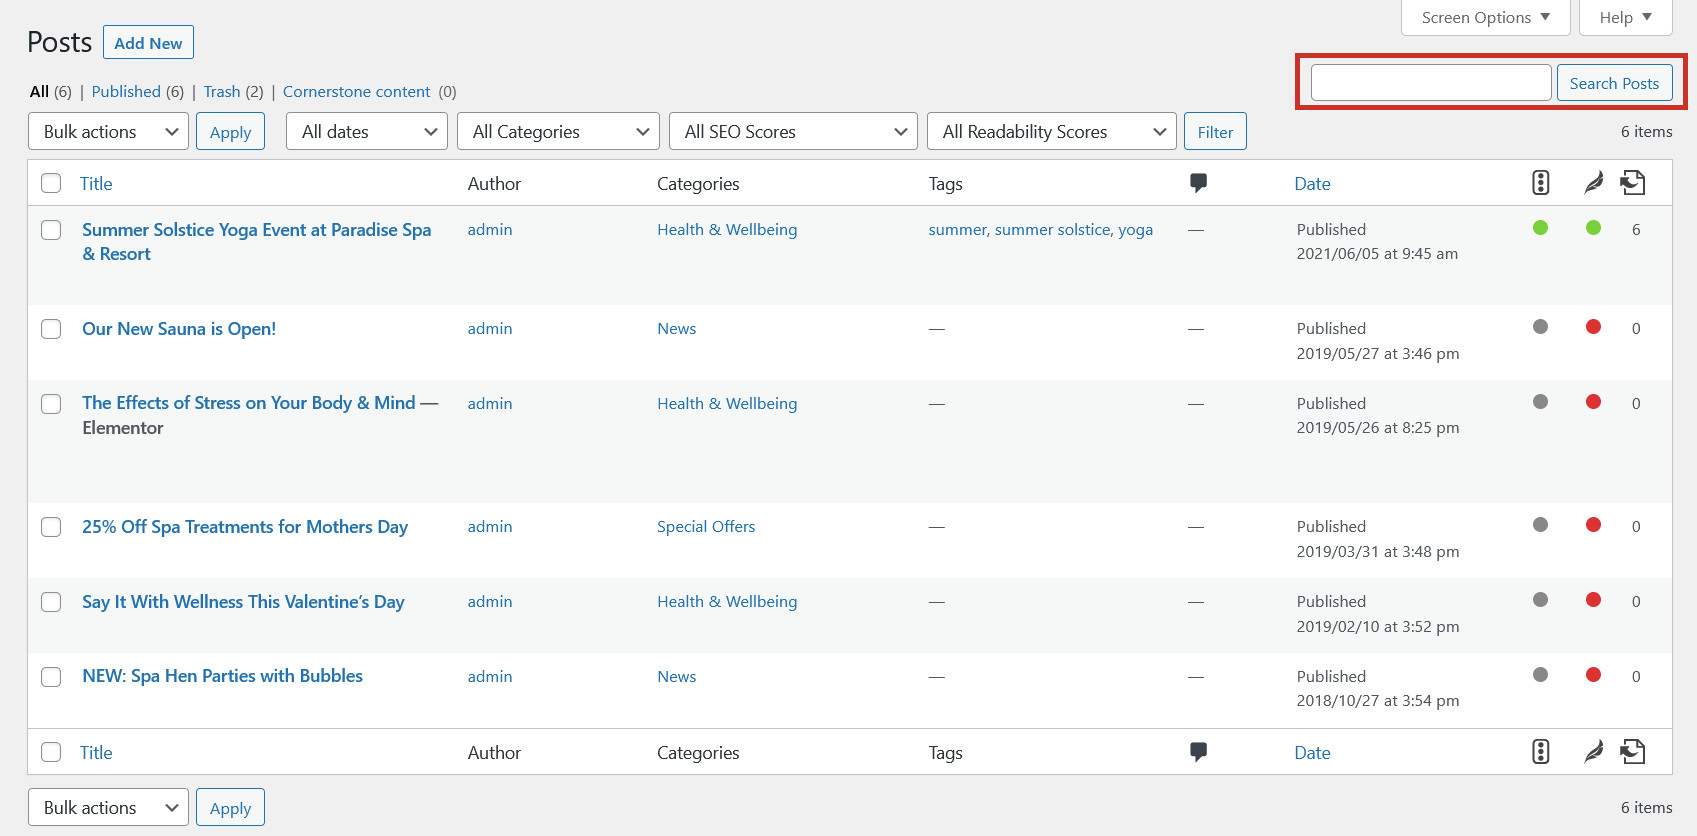
This will show you a list of all your blog posts, which you can browse through or use the search tool to find the post you need to edit:
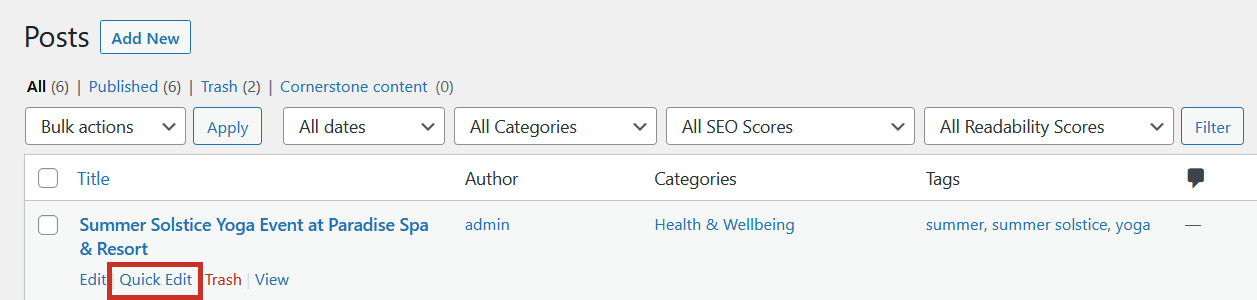
To make a Quick Edit (change title, date, categories, or tags) you can simply hover over the post you wish to edit and click Quick Edit:
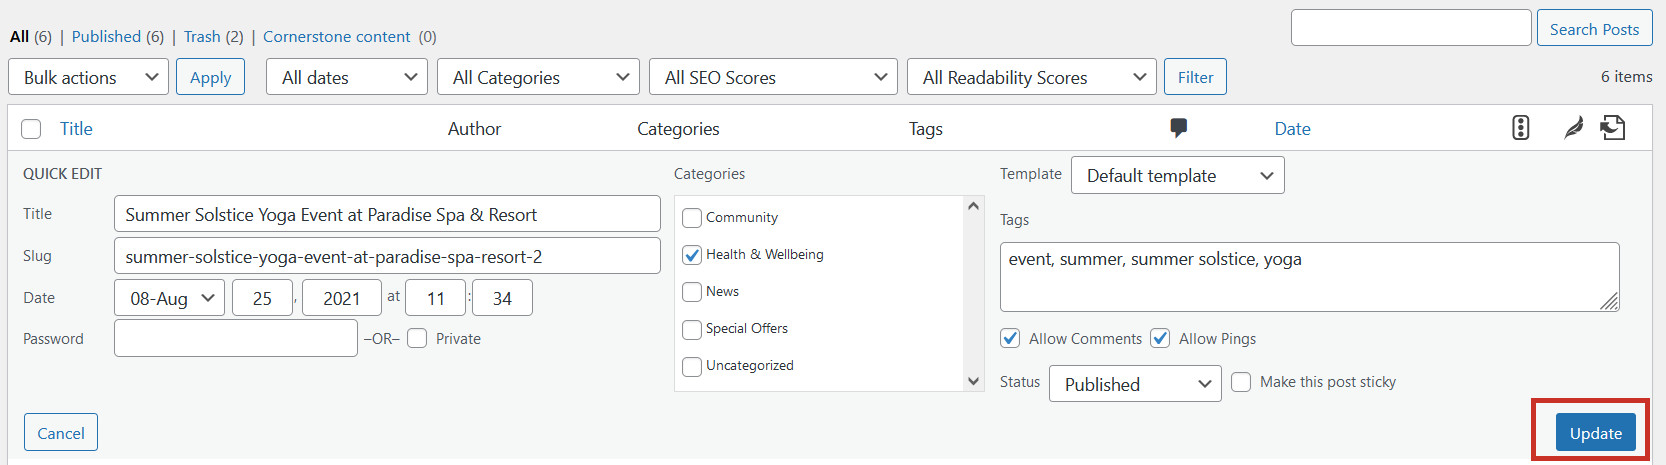
This will open up a Quick Edit interface for the post so you can quickly make the neccessary changes, and then click Update:
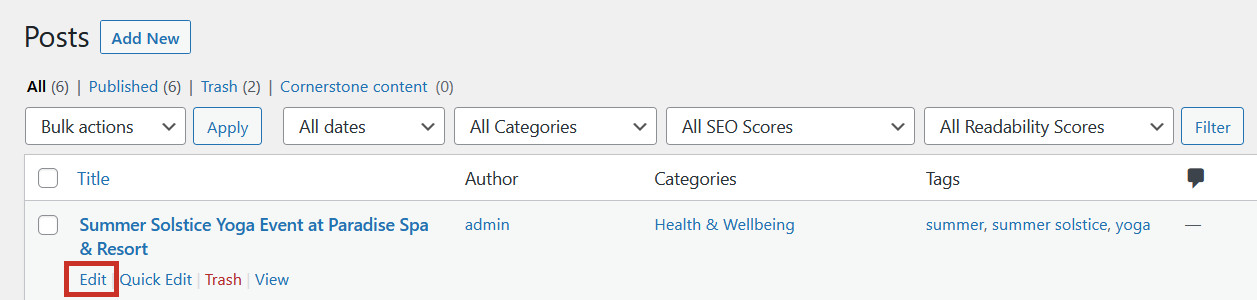
To make more elaborate edits to the post (change the featured image, edit the content, optimise with Yoast SEO), simply click on the post title to open the editor (or click the Edit link which appears on hover):
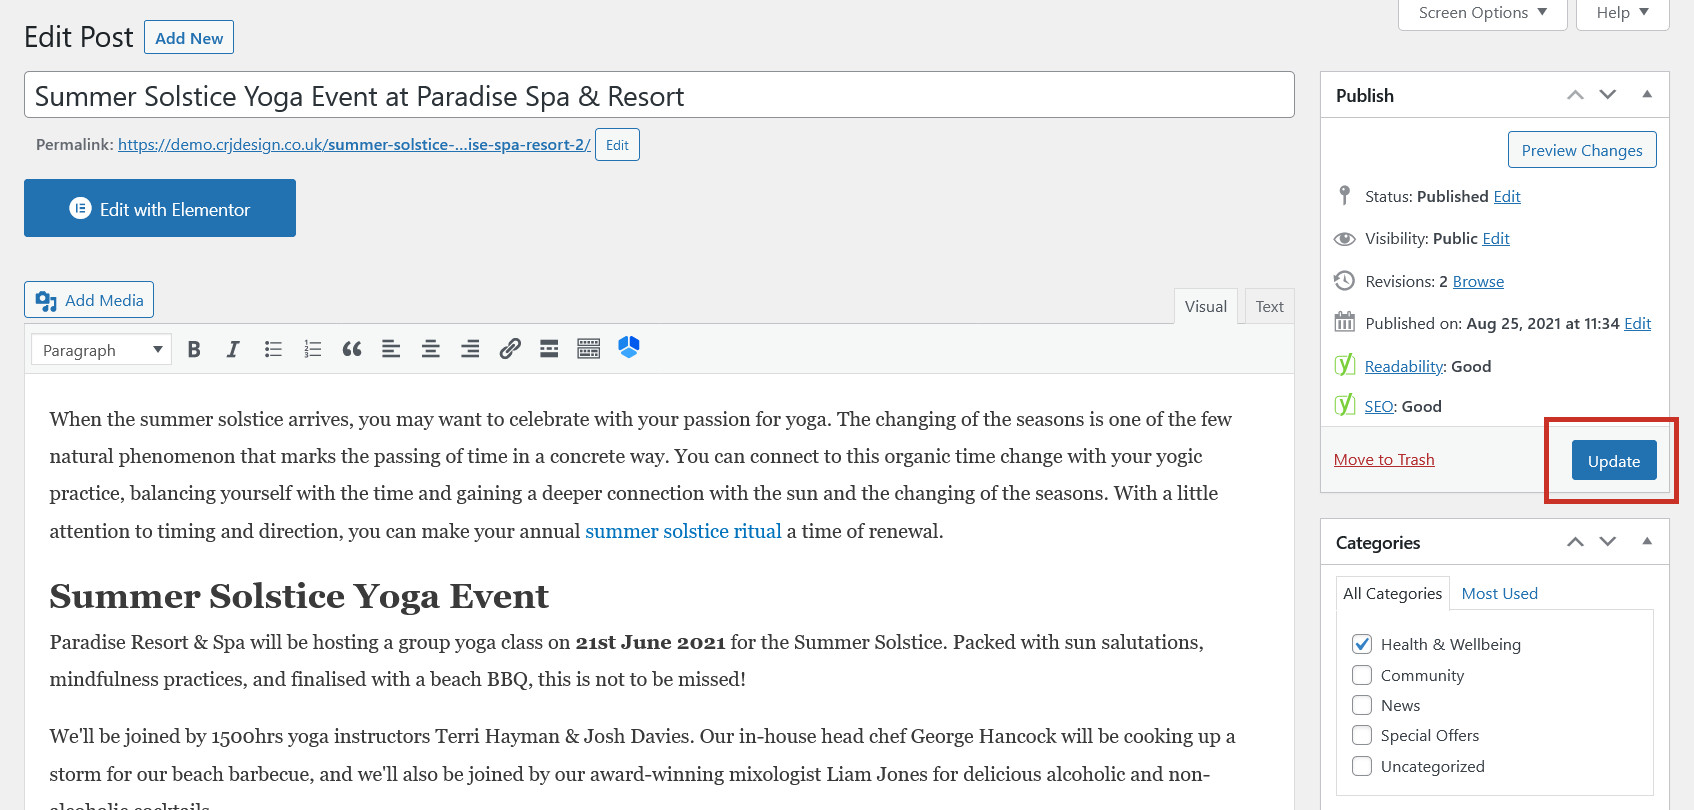
Here you can make any changes you need to (or delete the post) and click Update to save your changes:
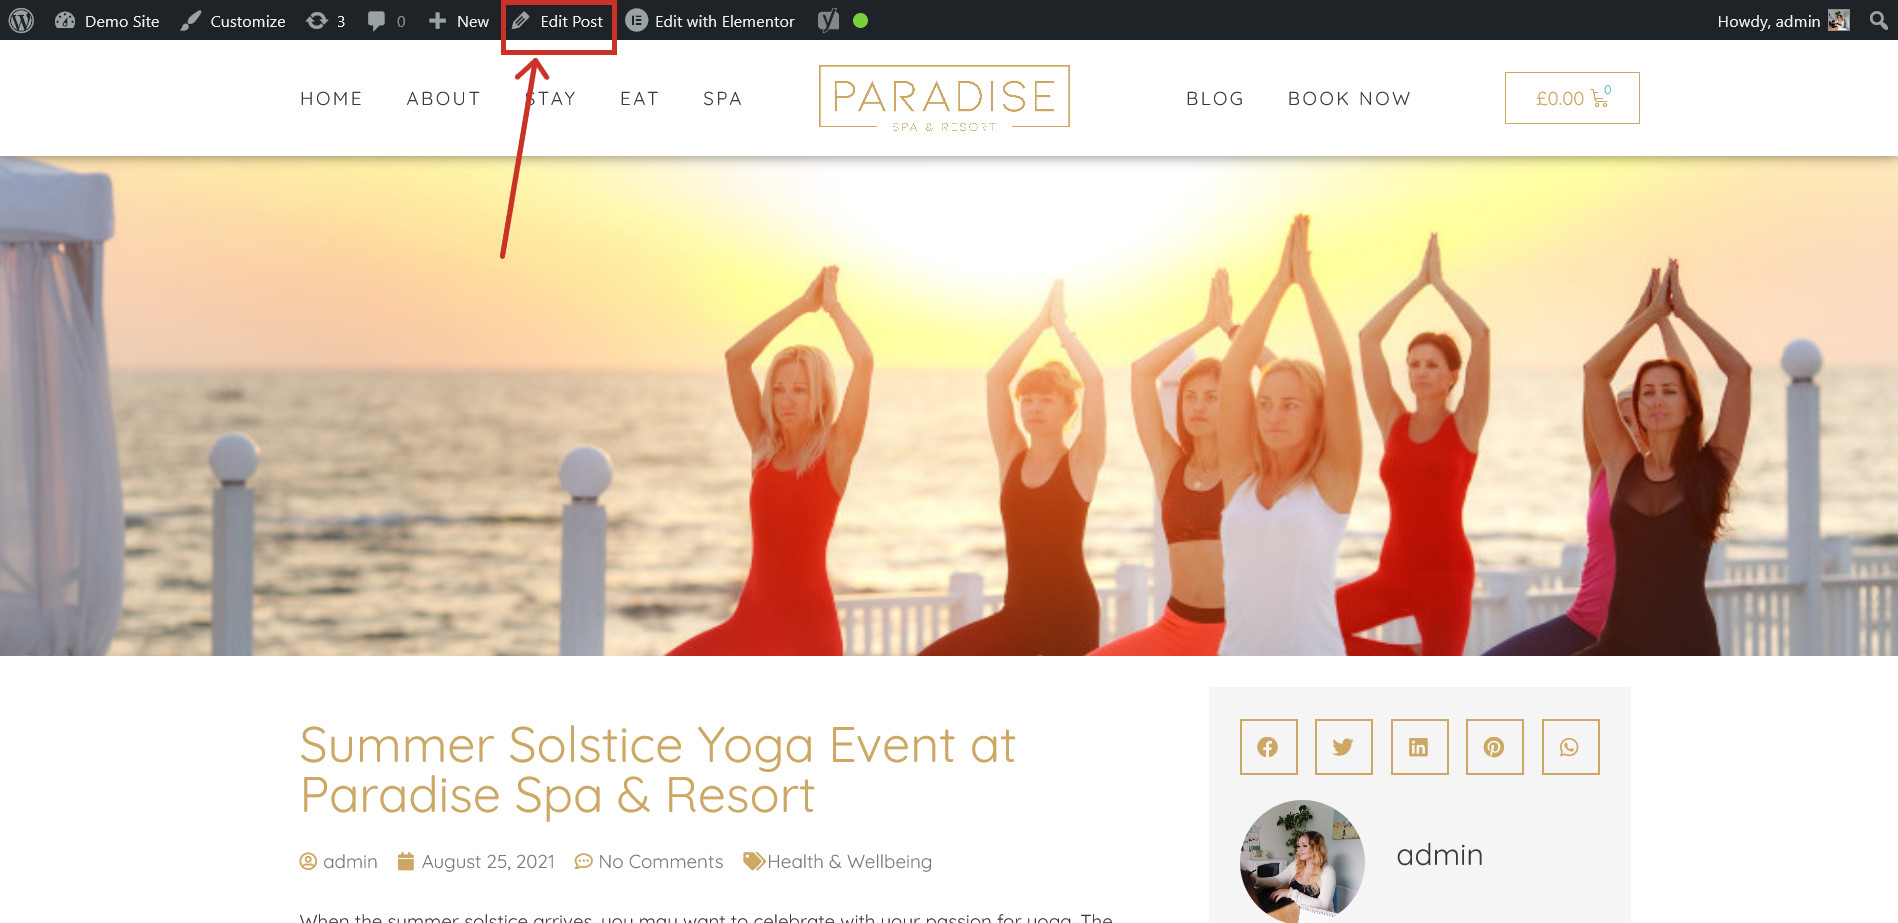
An alternative way to edit a post is to visit the post on your website and click Edit Post in the top toolbar, which will open the editor for it:

After editing your blog post, you may need to update your social media previews for the changes to show in your Facebook, Twitter & LinkedIn posts.